
 Facebook
 Instagram
 X (Twitter)
 TikTok
 Pinterest
 YouTube
 LinkedIn
 Threads
 Google Business Profile
 Telegram
 Discord
Food Photography Without a Studio: Light, Angles and Styling


Not every food photo needs to move to earn its place in a feed. Pinterest pins, product pages, Instagram carousels and the still frame that opens a video all still run on photography, and food is genuinely one of the more forgiving categories to shoot well without a studio, once a few specific habits replace a few common instincts. This guide is the still-photo counterpart to our guide to food product video for TikTok, and both follow from our guide to marketing a food brand.
Light is the entire difference
More than any other category on Shopify, food photography lives or dies on light, specifically on avoiding the one light source most homes default to: an overhead kitchen bulb. Overhead light flattens texture and casts an unflattering shadow straight down onto anything with height, a stack, a scoop, a garnish. A window, with the food positioned beside it rather than facing directly into it, gives food the soft, directional shading that makes it look like something worth eating rather than something documented.
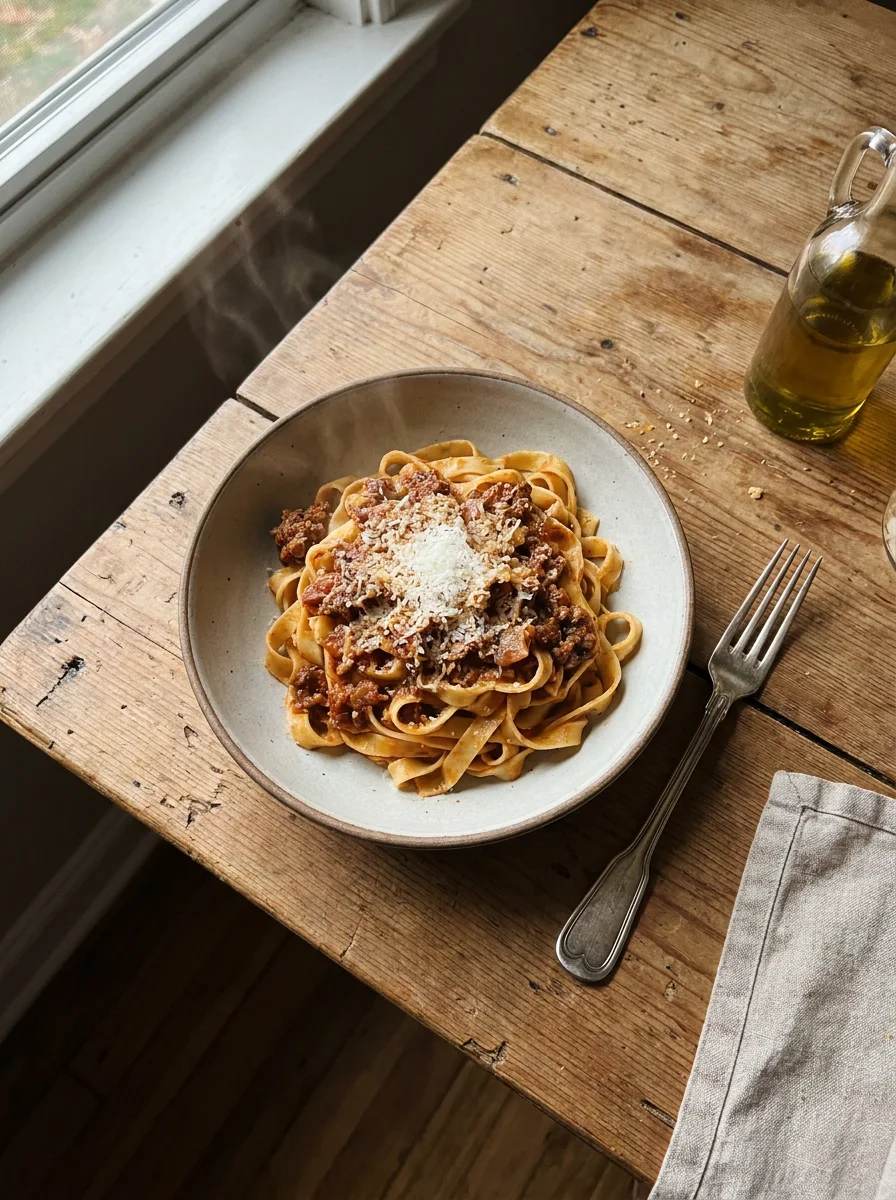
Midday sun through a bare window is often too harsh; a sheer curtain, or simply shooting a little earlier or later in the day, softens it into exactly the kind of even, directional light professional food photographers spend real money recreating artificially.
A simple reflector fixes most of what remains: a piece of white foam board or even a sheet of paper, held opposite the window, bounces light back into the shadowed side of the plate without adding a second light source or any real cost. This one habit is the closest thing to a shortcut in food photography that actually works reliably.
Angle depends on the food
- Straight overhead for anything flat and arranged: a bowl, a spread, a flat lay of ingredients. This is the classic Pinterest-recipe angle for a reason: it shows the full composition at once.
- A low, straight-on angle for anything with height: a stacked burger, a tall drink, a layered dessert. Shooting these from above collapses exactly the dimension that makes them look impressive.
- A slight three-quarter angle as the safe default when unsure, close to how a person actually looks down at a plate in front of them, which is part of why it tends to feel natural rather than staged.
When in doubt, shoot the same setup from all three angles before moving on. The difference between an angle that flatters a specific dish and one that flattens it is not always obvious until you compare frames side by side, and it costs nothing but a few extra seconds to have the option later.
Styling that takes minutes, not a food stylist
A few small habits do most of the work a professional food stylist is paid for.
- Wipe the plate's rim. A single sauce smear on the edge of an otherwise clean plate reads as careless in a photo far more than it does in person.
- Add one texture element. A scatter of herbs, a dusting of powder, a drizzle, something that catches light differently from the main dish and gives the eye somewhere to land.
- Use height deliberately. A slightly taller stack or scoop photographs better than the same food pressed flat, even if you would naturally plate it flatter for actually eating.
- Freshness first, always. Ice cream photographed the instant it is scooped, herbs added right before the shutter, a drink poured seconds before the shot. Food photography has almost no forgiveness for anything sitting out.
- Keep the background genuinely simple. A plain wooden or stone surface, one or two supporting props at most. A cluttered background competes with the one thing that is supposed to make someone hungry.
Build a small, reusable prop set the same way a home decor seller would: one or two plates, one board or surface, a cloth napkin, a few pieces of cutlery, used consistently across products rather than assembled fresh each time. A consistent set of props reads as a considered brand identity across a feed; a different plate and surface in every photo reads as a series of unrelated snapshots.
Drinks and pours need their own approach
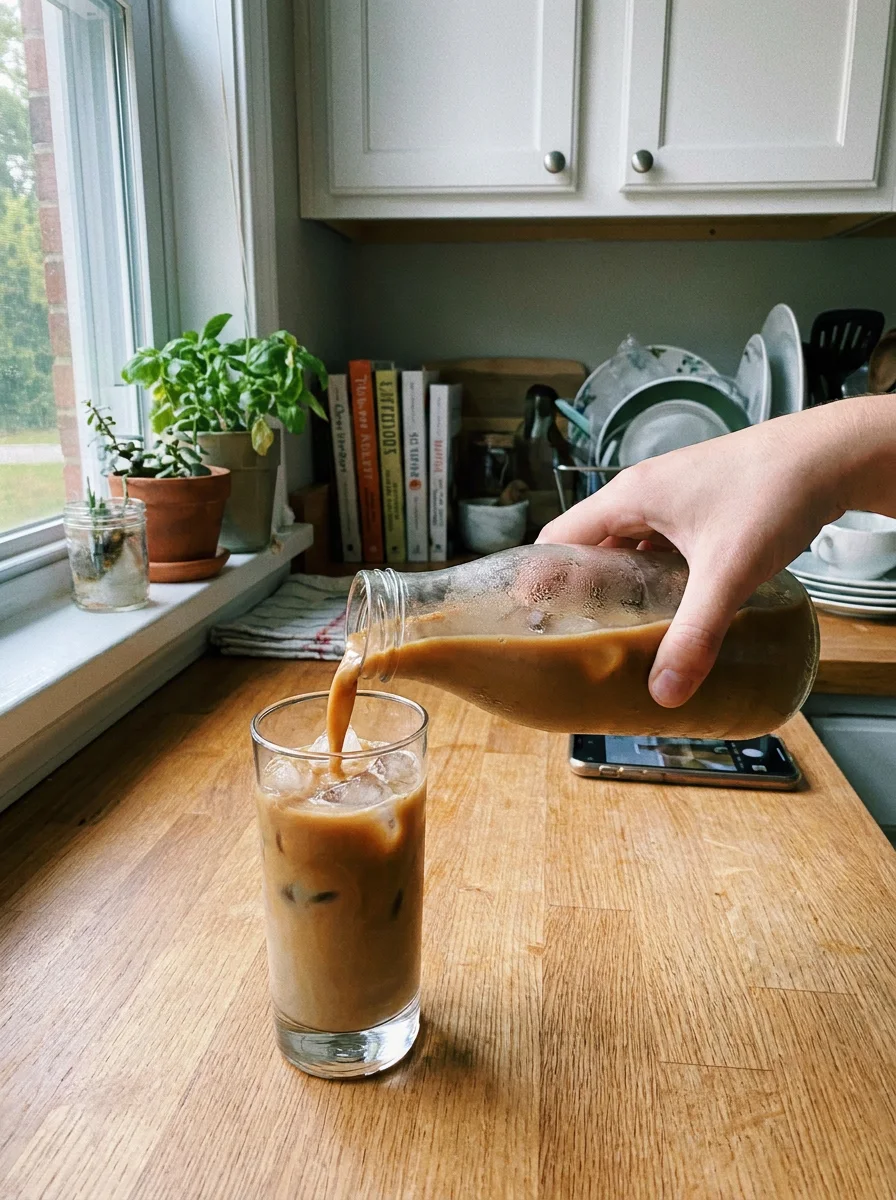
Condensation, ice and motion are the three things that sell a cold drink in a photo, and all three are time-limited: condensation forms and then drips, ice melts, a pour is over in a second. Have the glass, the drink and the camera all ready before you start, and treat the shot as something to capture in a burst of several frames rather than a single careful setup, since the best moment (the pour mid-air, the condensation at its peak) lasts only a second or two.
A hot drink runs on the opposite clock: steam is the whole appeal, and steam fades within seconds of pouring. Have everything else in frame arranged and ready first, pour or plate last, and shoot immediately rather than adjusting props around a drink that is already losing the exact quality that made it worth photographing.
Editing, kept honest
A small brightness and warmth adjustment, applied consistently across every photo, does more for a cohesive feed than any single dramatic edit on one photo. Resist pushing saturation far past reality specifically for food: an oversaturated red sauce or an unnaturally vivid green herb reads as fake the moment the real product arrives looking more ordinary, which costs more in disappointed customers than it gains in a punchier photo.
Batch the shoot the same way any other product photography benefits from batching. Set up the light and background once, then move quickly through several dishes or drinks in sequence while the setup and the light are both still right, rather than tearing down and rebuilding for each individual product on a separate day.
Where Yoomru fits
Once you have styled photos, whether shot this way or generated as a template video from our TikTok video guide, Yoomru's collage tool can combine several product photos into one branded image, useful for a pairing, a "what's inside" post or a multi-item bundle, all from photos you already have. A planner then keeps posting across TikTok, Instagram, Pinterest and eight other networks on a schedule, so a good photography session covers weeks of content rather than a single post.
Before you post
- Is the light coming from a window, not an overhead bulb?
- Is the angle matched to the food's actual shape, not defaulted to overhead every time?
- Was this shot at the freshest possible moment, not after sitting out?
- Is the background simple enough that the food is clearly the subject?
- Does the color editing still look like something you would actually want to eat?
FAQ
Do I need a proper camera, or is a phone enough? A modern phone is enough for nearly all social content; light and styling make a far bigger difference than the camera itself.
What is the single most common mistake in home food photography? Shooting under an overhead kitchen light. Moving to a window before touching anything else about the setup fixes more photos than any other single change.
How do I photograph food that genuinely doesn't look appetizing on its own, like a sauce or a spice blend? Photograph it finished, in or on a dish, rather than in its own packaging or jar; a spice blend shown seasoning a plated dish photographs far better than the same blend in a bag.
Should props match my brand colors? Loosely, yes, but keep them plain and secondary. A background or napkin in a complementary tone helps cohesion; a background trying to match brand colors exactly often looks more artificial than a simple neutral one.
How many photos do I actually need per product? Two or three: one clean, well-lit hero shot, one closer texture detail, and one in-context or in-use shot, covers most of what a product page and a week of social posts both need.
Is it worth investing in a proper lightbox or tent for food specifically? Rarely. Lightboxes suit small, evenly lit product photography like jewelry or cosmetics far better than food, which usually looks more appetizing with the directional, slightly uneven light a window provides than with the flat, shadowless light a lightbox is built to produce.
What backdrop is safest if I only buy one? A mid-toned wood board or a plain stone-look surface works across the widest range of dishes and drinks, more reliably than pure white, which can wash out lighter foods and drinks entirely.